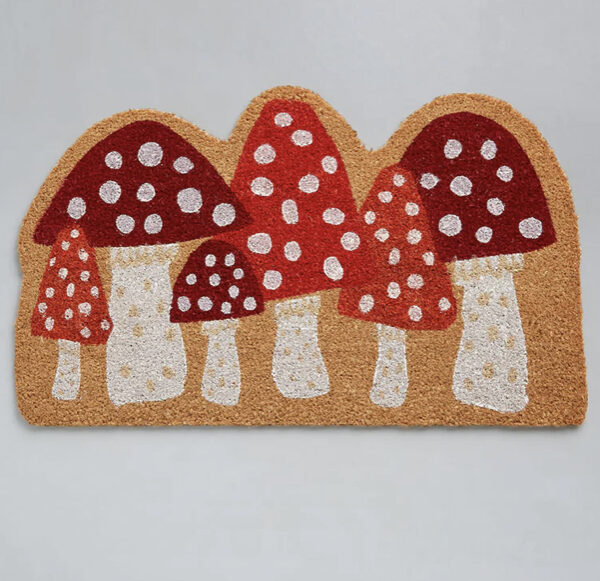
HANDPAINTED MUSHROOM DOORMAT
03/10/2023Not all DIYs turn out as I had hoped. This is one of those projects. I mentioned before my new obsession is mushrooms. When I saw this doormat online, I was smitten.
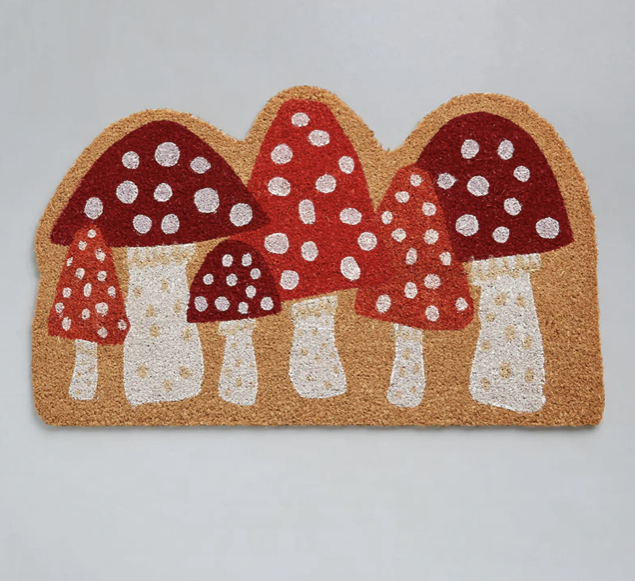
And then I thought, why don’t I make one similar myself for half the price using a blank doormat? Because I’m cheap and because I wanted the challenge of painting my own.
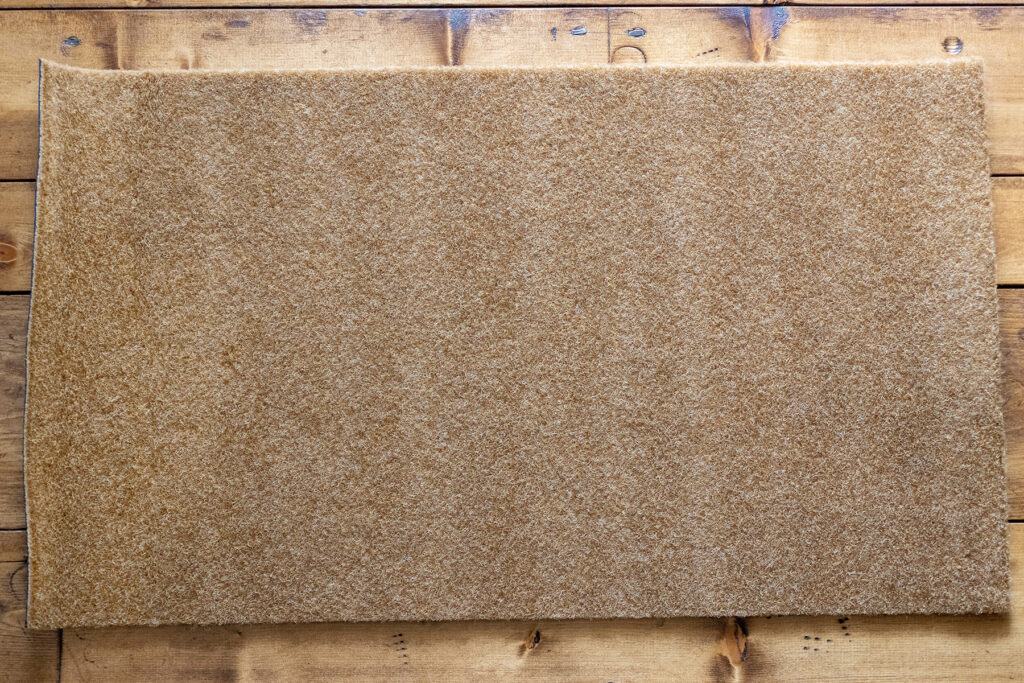
I had this large drawing pad that was similar to the same size as the mat. Thank goodness for the thousands of dollars spent for my son’s architecture classes. Now I have a ton of barely used art supplies that come in handy for my crafts. If I wasn’t so lucky as to have this overpriced drawing pad, I would have just taped pieces of printer paper together. I drew mushrooms using the original doormat as inspiration.
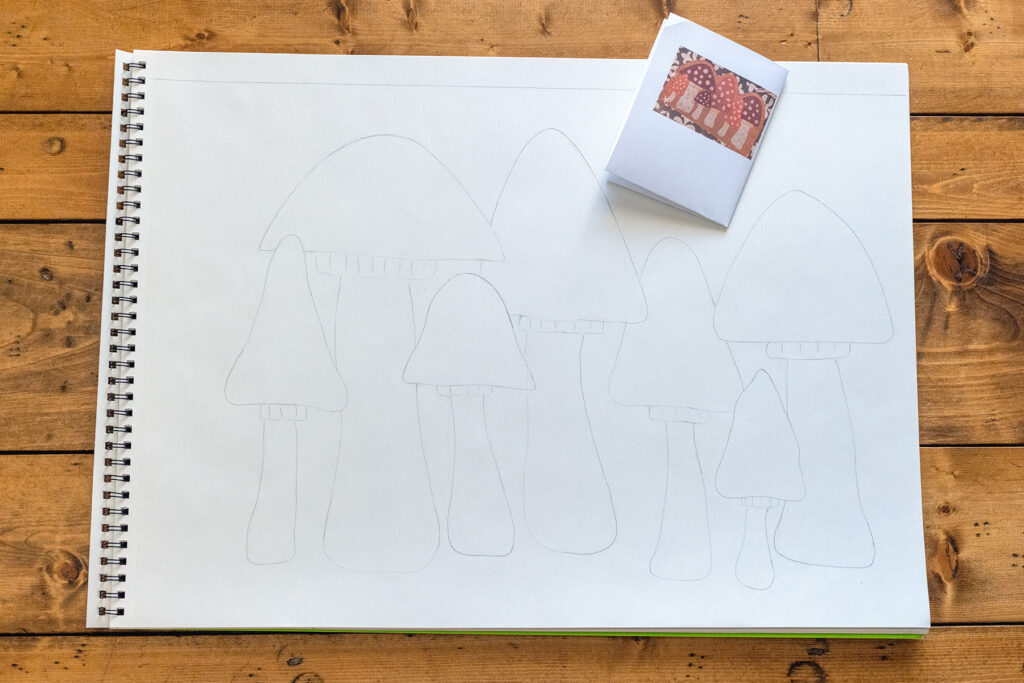
Then I cut out each mushroom individually so I could trace them onto the mat.
You might notice later on that I added two additional mushrooms. When I drew the patterns on the mat, they weren’t quite centered. To fix it, I just added more mushrooms.
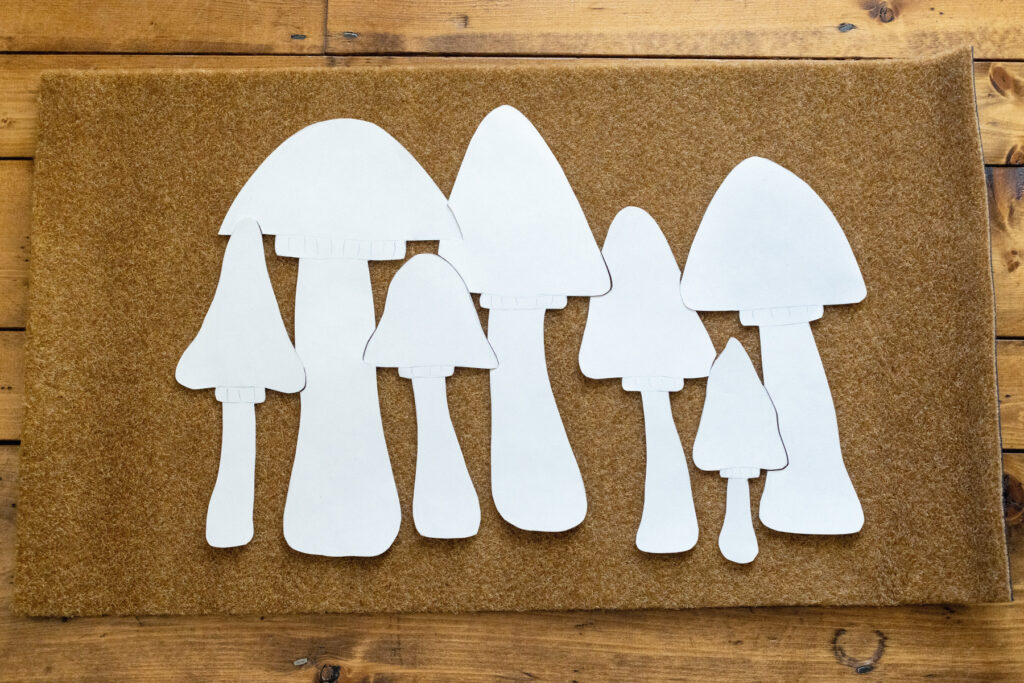
I used a Sharpie to transfer the mushrooms onto the mat.
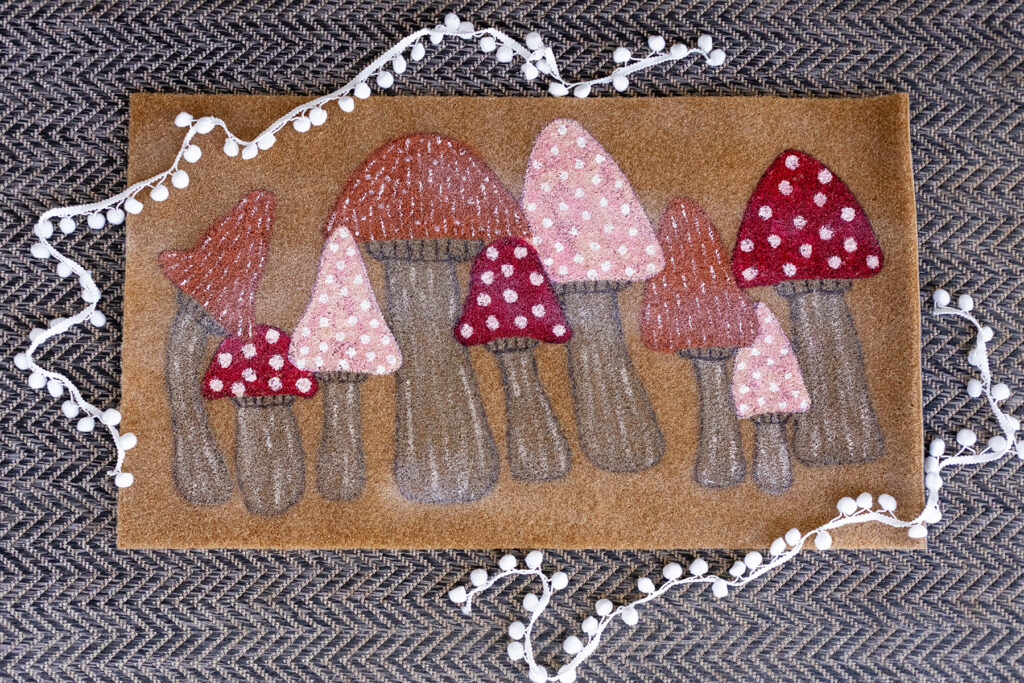
Using acrylic craft paint, my daughter and I took turns painting the mushrooms.
Now for my epic fail. Once the mat was painted, I figured I should use something to seal it. I was also hoping the sealant would brighten the colors a bit since the paint dried more muted than I had hoped. I grabbed what I thought was clear spray sealant, began spraying it on and it started turning white. I couldn’t figure out why the clear was going on white. Then I actually read the can. It wasn’t clear sealant. IT WAS WHITE SPRAY PAINT!! Ugh. I hoped for brighter colors. What I had after the white spray paint were even more muted colors. I am still so mad!
Thankfully it’s still usable. It just makes me mad every time I look at it. To make myself feel a little better, I took silver and gold spray glitter – tripled checked the cans before spraying this time – and sprayed it all over the mat so it sparkles in the sunlight. Because everything is better with glitter.
Here is the final product. Not exactly how I envisioned but okay, I guess, but not near as cute as the original I should have just bought in the first place. You can’t win them all.
Shop This Post